
With CentOS 7 just released, I thought it would be a great time to make a CentOS 7 64Bit server installation step-by-step guide, with pictures and everything just like the old CentOS 6.5 64Bit server installation guide.
Requirements for installing a CentOS 7 64Bit server
You don’t need much for this, of course you need a computer or server to install this on, and the only other things you need are a working internet connection on the server and the CentOS 7 64Bit iso.
You can download the iso here: http://centos.skarta.net/7.0.1406/isos/x86_64/CentOS-7.0-1406-x86_64-DVD.iso
Burn or mount the CentOS 7 64bit ISO and boot it up
Burn the iso to a DVD or mount it if your server is a virtual machine.
Then boot up the system and you should be greeted with the following screen:

At this screen, mark the “Install CentOS 7” (or press I) and hit Enter.
First step of the CentOS 7 installation – Language
First you have to choose which language you want the installer to be. In my example I will choose English.
Choose whatever you want and click the “Continue” button, but I recommend that you pick English, to make sure you can follow this guide step-by-step without having to translate.

Hint: You can also change the keyboard at any time doing the installation in the upper right corner of this screen (see screenshot above)
Main setup screen of CentOS 7
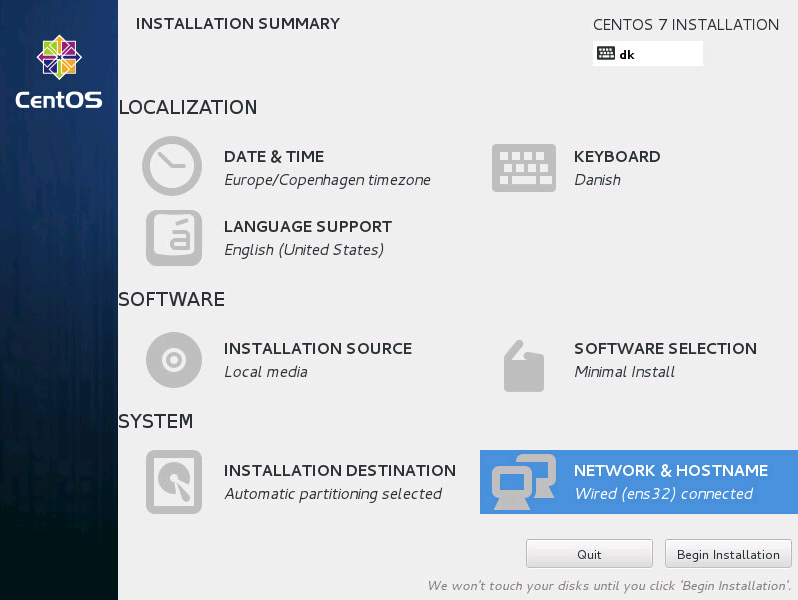
Once you have selected your language, you will get the main installation screen. almost everything you have to do is located on this screen.
(screenshot of the main installation screen for CentOS 7)
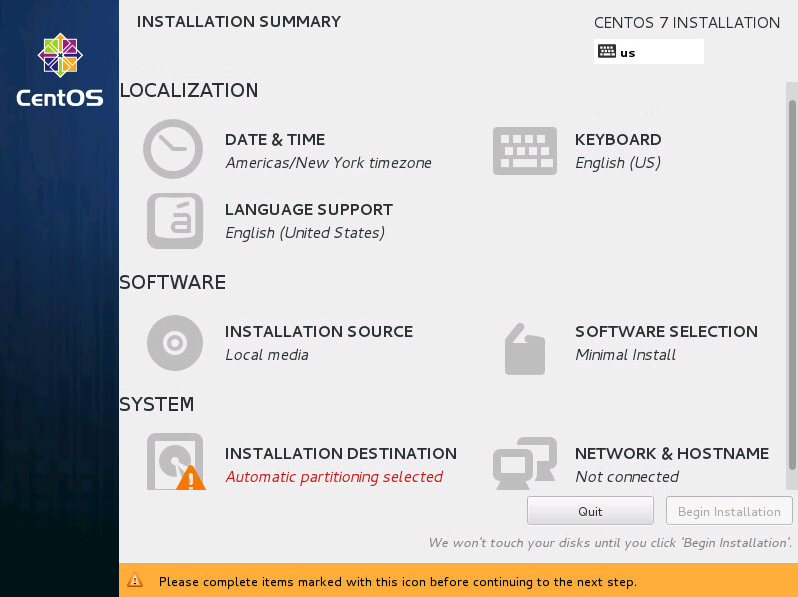
In the next steps of this howto tutorial, I will go into details about every single item on the main installation screen, one by one starting from the upper left.
Setting date and time
The first one on the main installation screen is the “Date & time”, click it using your mouse to get the following picture:
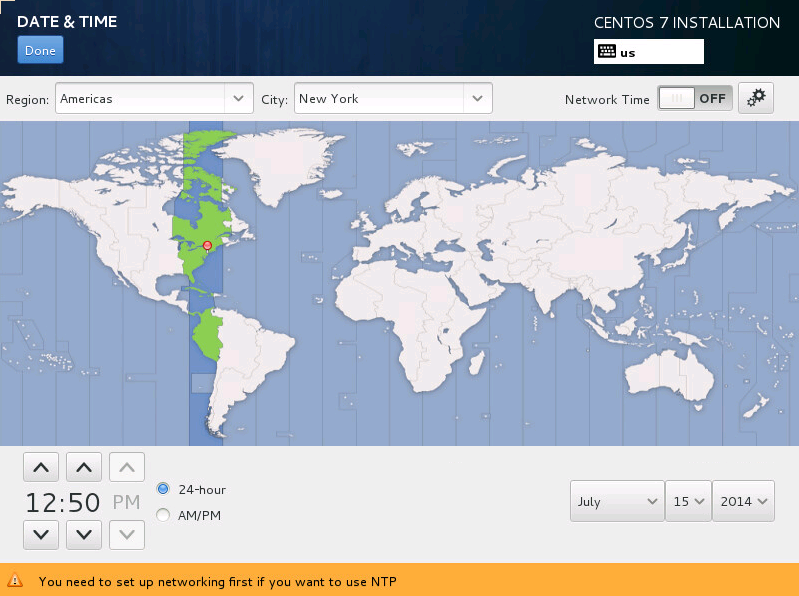
On this screen, you simply have to pick you timezone (you can click on the map!) and make sure that the time and date below the map is correct. When everything looks fine, press the blue “Done” button in the upper left corner, you will then be back at the main installation screen.
Choosing keyboard layout
The next one is the “Keyboard” item on the main installation screen.
This is not the same as the one in the upper right corner where you picked the keyboard layout for the installation process! This one is the keyboard layout that will be installed on your system for when the installation is done.
The Keyboard layout screen looks like this:
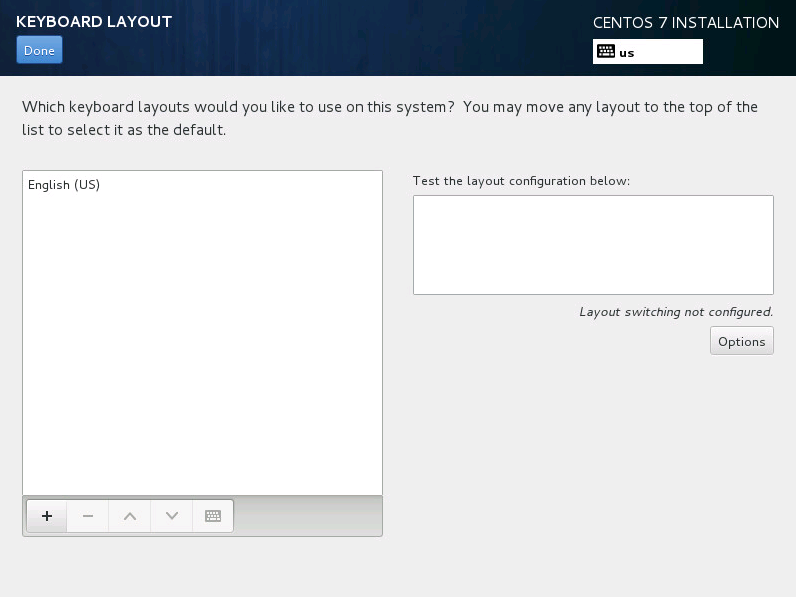
Click the big “+” button in the lower left corner and find your keyboards language (you can search) and then press the “Add” button to add it.
I will then be added to the list of keyboard layouts.
Select the ones you don’t need in the list, and click the “-” button to the right of the “+” button to remove them.
When finished, click the blue “Done” button in the upper left corner.
Language support
The next one is “language support”, click it and you will get the following screen:

The language you choose in this screen, will be the language your system talk to you in.. example if you type a command wrong you will get the “command not found” message returned. Text like this will be in the language you choose here.
Pick the language of your choice, default is English. When done, click the blue “Done” button in the upper left corner.
Installation source
Since we have everything on the ISO that we need for now, there is no reason for changing the installation source. You can skip this one.
If you click it, you can see that you have the options to specify the installation media from a network URL or similar. But we don’t need this.
Software selection
In this step, you have to choose what software you want the installer to install. This is made so you only get exactly what you need.

Now, default is “Minimal installation” and I like to keep it that way, and then install the stuff I need afterwards manually.
There is however some predefined options like “Webserver” or “Fileserver” that will preinstall some packages and software for you.
If you want something special, feel free to pick it instead of the default “Minimal installation” that I will choose.
If you need a desktop GUI, there is an option called “Server with GUI”, this will install a desktop environment. But remember, this takes up system resources (memory) and slows down bootup time, so only install a desktop environment if you need it.
Once done selection the predefined installation option you want, click the blue “Done” button in the upper left corner to return to the main installation screen again.
Installation destination
In this option, you have to choose where to install the system. This is usually a hard drive that you have in the server/computer.
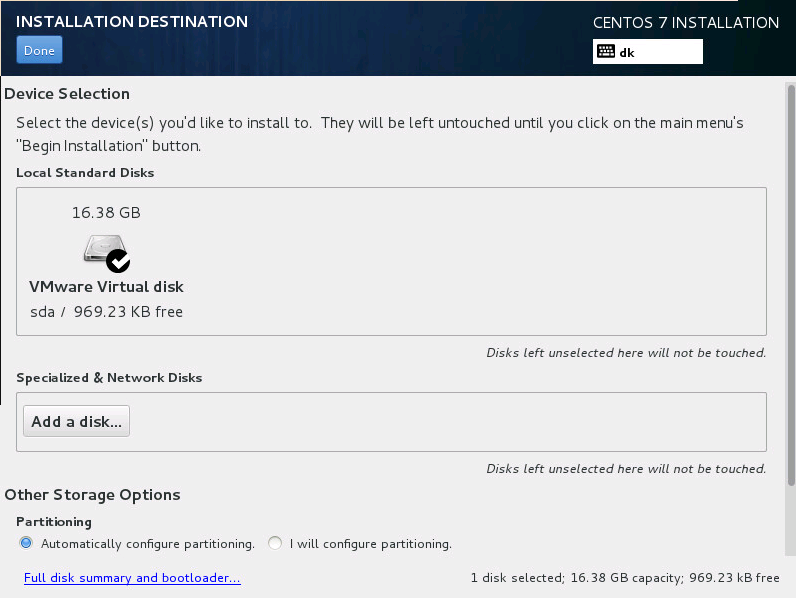
As you can see in the screenshot above, I have 1 hard drive of 16 Gigabytes.
Make sure that the hard drive you want to install the system on has the check mark on it by clicking it (if it goes away when you click it, then click it again)
BEWARE: All data on the hard drive you choose will be deleted. So make sure to choose the correct one, and that you have a backup of your files.
You now have 2 choices at the bottom of the screen, to partition automatically or manually.
This guide will not cover manually partitioning you hard drive. but you can take a look at it if you want.
To make this guide as easy as possible, I will pick the automatic partitioning and click “Done” in the upper left corner.
If your hard drive is empty, it will just send you back to the main installation screen, but if your hard drive contains partitions, it will ask you to reclaim the space on it in a popup like shown below:

Click the lower right “Reclaim space” button. You should then get the following screen:
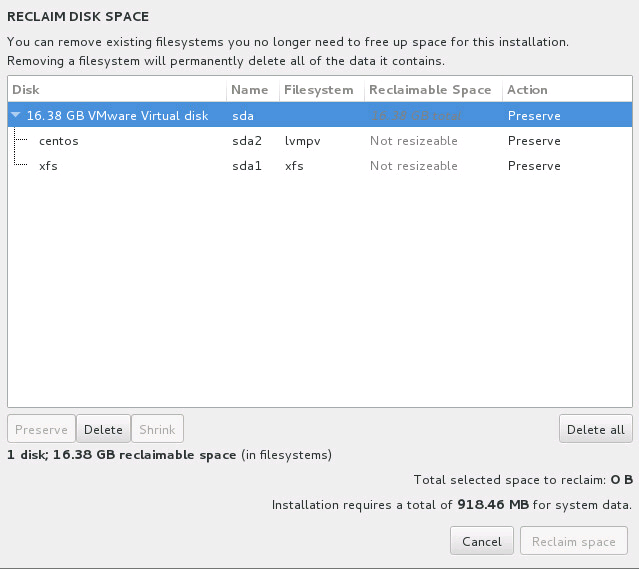
Press the “Delete all” and then “Reclaim space” in this popup, and you should be returned to the main installation screen.
Network & hostname
The last one is where you have to set the hostname and network options. It will look like this, when you click the option on the main screen:
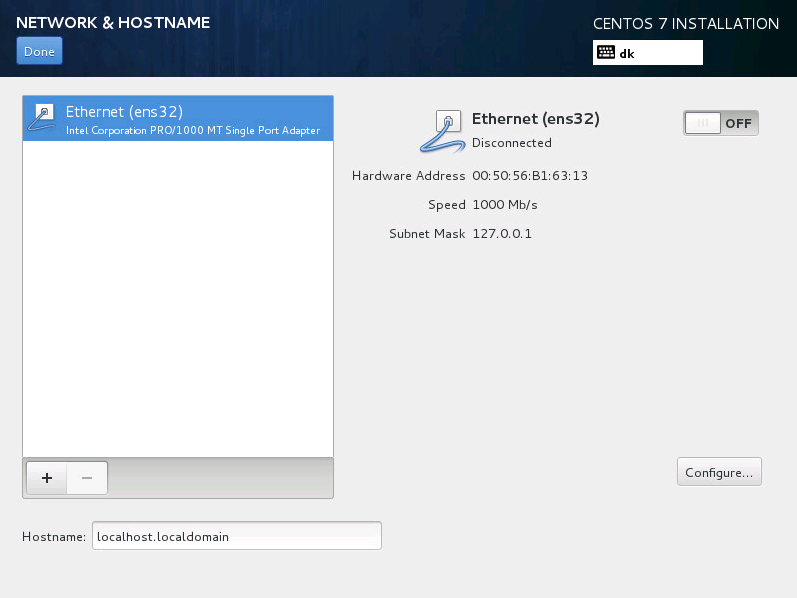
As you can see, I have 1 network adapter in the list on the left side. You might have more, if you have multiple network adapters in your server/computer.
If there are none, then your network adapter is not supported by CentOS 7, or it’s broken.
In this guide, I will only be going through the basics of networking. You can however if you have multiple network adapters team/bond them together to make load balancing or failover available.
Choose the network adapter you want to use in the list to the left.
You will then see a “on/off” switch to the middle right. Click it to make it turn blue on the “On” position.
DHCP/manual ip configuration
If you want to receive the ip adress through DHCP on your server (get the ip address assigned automatically by your router/DHCP server) you can skip this step, else if you want to set a static ip address manually, do the following.
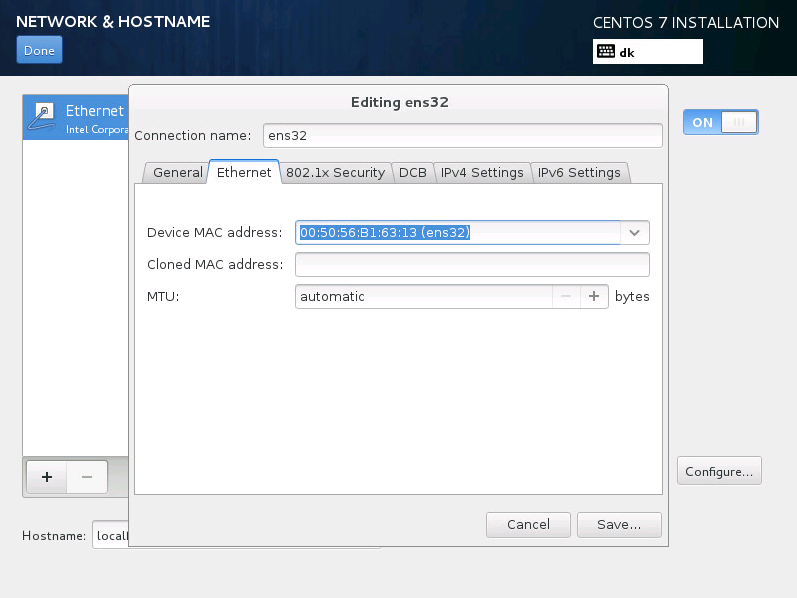
With your network adapter still chosen in the list to the left, and the switch to “On” on the right to enable it, click the “Configure” button at the lower right corner.
You should now see something like in the following screenshot.
Go to the tab called “IPV4 Settings”, then click the “Add” button to the right, and add the IP address you want this server to have (Make sure it’s not already in use), the netmask and the gateway. If you are doing this, you should know what they have to be, I can’t tell you because your network is different from mine, but in the example below. you see what my server is using.
Hint: In netmask, you can type both the short version (“24”) or the long version (“255.255.255.0”)
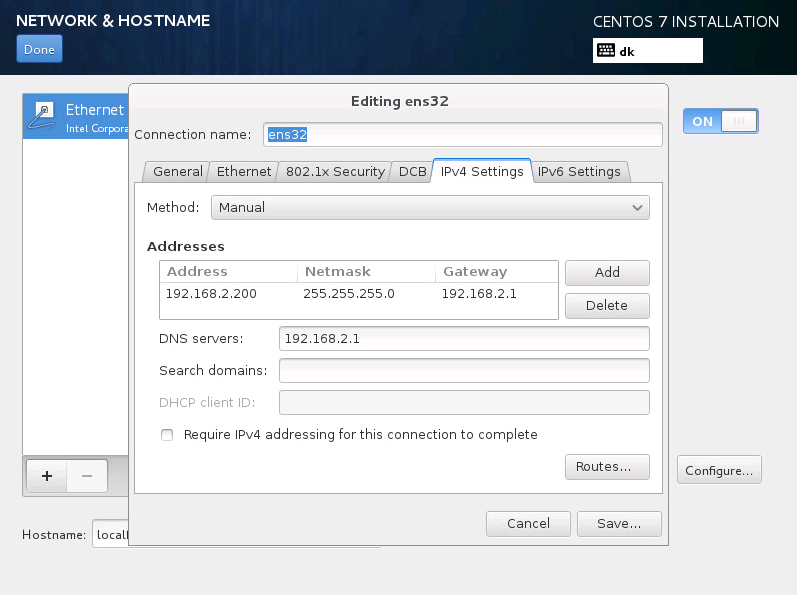
When done, press the “Save” button in the lower right corner of the popup and you are back at the list with your network adapters.
Hostname
At the network adapter list screen, you have to set the hostname in the lower left corner. Default is “localhost.localdomain” you can type the name you want the server to have here. I my case I will leave it at the default.
Press the blue “Done” at the top left corner to return to the main installation screen.
Begin the installation
Now that you have been through all of the options in the main screen, there should no longer be any yellow triangles telling you that you need to configure something, and the “Begin installation” button in the lower right corner is now clickable like in the picture below.
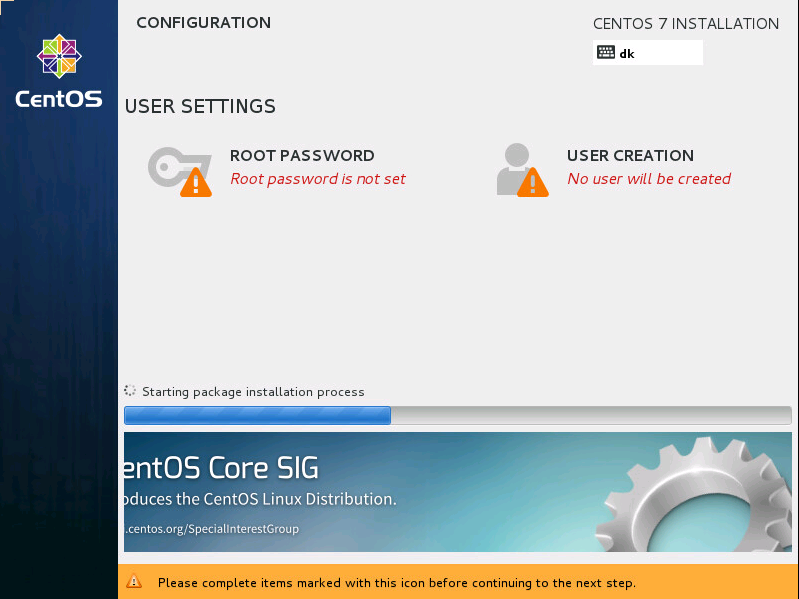
Click the “Begin installation” button so begin installing the files with your configuration to the hard drive, you will then get the following
Setting the root password
While it’s installing, you have to set the root password.
Click the “root password” button in the middle of the screen and you will get the following.
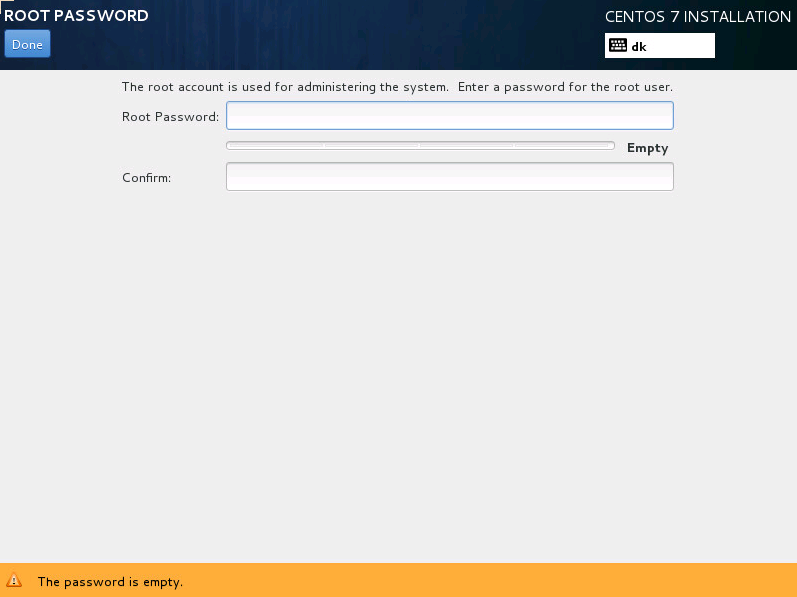
Type in the password you want the root user to have in both password fields and press “Done” in the upper right corner.
Make sure to choose a strong password, it will warn you if it’s not strong enough.
If you want to use a weak password, you have to press the “Done” button twice so the installer knows that you really really want to use a weak password.
You will then get back to the installation progress screen.
More users
If you want more users other than root, you can create some by clicking the “User creation” button to the right.
If you are good with the root user only, you can skip this step.
I’m fine with only having a root user, since I’m the only one who has to log into this server, so I will not create a secondary user. But if you want to, just click the “User creation” button and fill out the text fields with the information it’s asking for then press “Done” and you are back at the installation progress screen.
Just like in the picture below.
“Username” is the name the user has to type when logging in, this may not contain any special characters.

Finish and reboot
You are almost done. When the progress bar is at 100%, you can click the “Finish configuration” button in the lower right corner.
Click it.
It will then do some more background stuff, and when the progress bar is at 100% again, the button in the lower right corner has changed to “Reboot”
Click the “Reboot” button to reboot the server/computer.
You will see some text scrolling on the screen, the DVD/ISO will eject automatically and after a minute or two you will see the following on your screen.
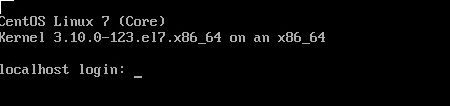
This is the login screen, and you can type the “root” user here and press Enter. Then the password and press Enter, and you should be logged in.
If you created a secondary user, you can login with that one here too.
Updating
Yes, you maybe just downloaded the ISO from the internet, so it should be 100% up to date right?
Well, it can happen that while you installed your CentOS 7 server, some updates has been released. So to make sure your CentOS 7 system is 100% up-to-date, run the following command to check for updates (and update if there are any) (you need to be logged in with the “root” user to do this):
yum update
As you can see in the screenshot below, I have quite a lot of updates already. even through I downloaded the ISO just yesterday!
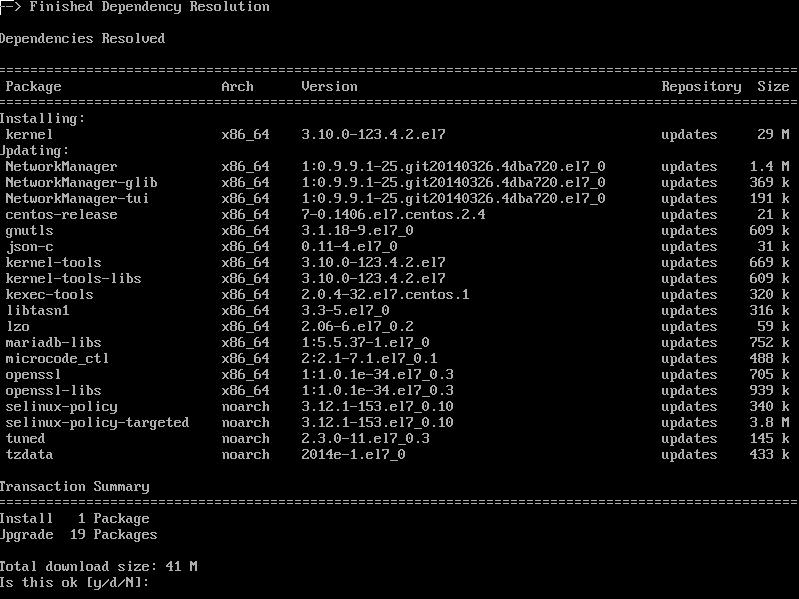
Type “Y” to tell it that you would like to apply the changes, and press Enter.
If it asks you any other questions, you have to type “Y” and press enter, or the update will cancel.
Once the update is completed it will return you to the shell, ready to receive the next command.
Done
That’s it!
You are now done, and have a fully running CentOS 7 server / computer.
If you liked this guide, feel free to share it below, and rate it at the top of this page.
Hi
Very informative and pretty great to have the overview before the install. Also, I don’t know if it might be possible, to put a guide about how to enable a RDP connection to the CentOs ? Like from a win7 going rdp to the Centos machine.
Thanks again
RDP is a Microsoft thing.
If you are running your CentOS server with a GUI desktop, you might be able to use some sort of VNC (i have never used it) i only use SSH, which is terminal-only connection (so no GUI, desktop or any of that graphical stuff)
yes it’s ms thing however it’s doable and RDP can be done on X. It’s called XRDP!
wow thanks for the info provided
Enjoyed this tutor. Please i have a project to configure an ldap server with user authentification incoporated using centos 7. Can you help me with a tutor to guide me through?? Expecting your feedback please.
how I can connect to this server on my local network ?